
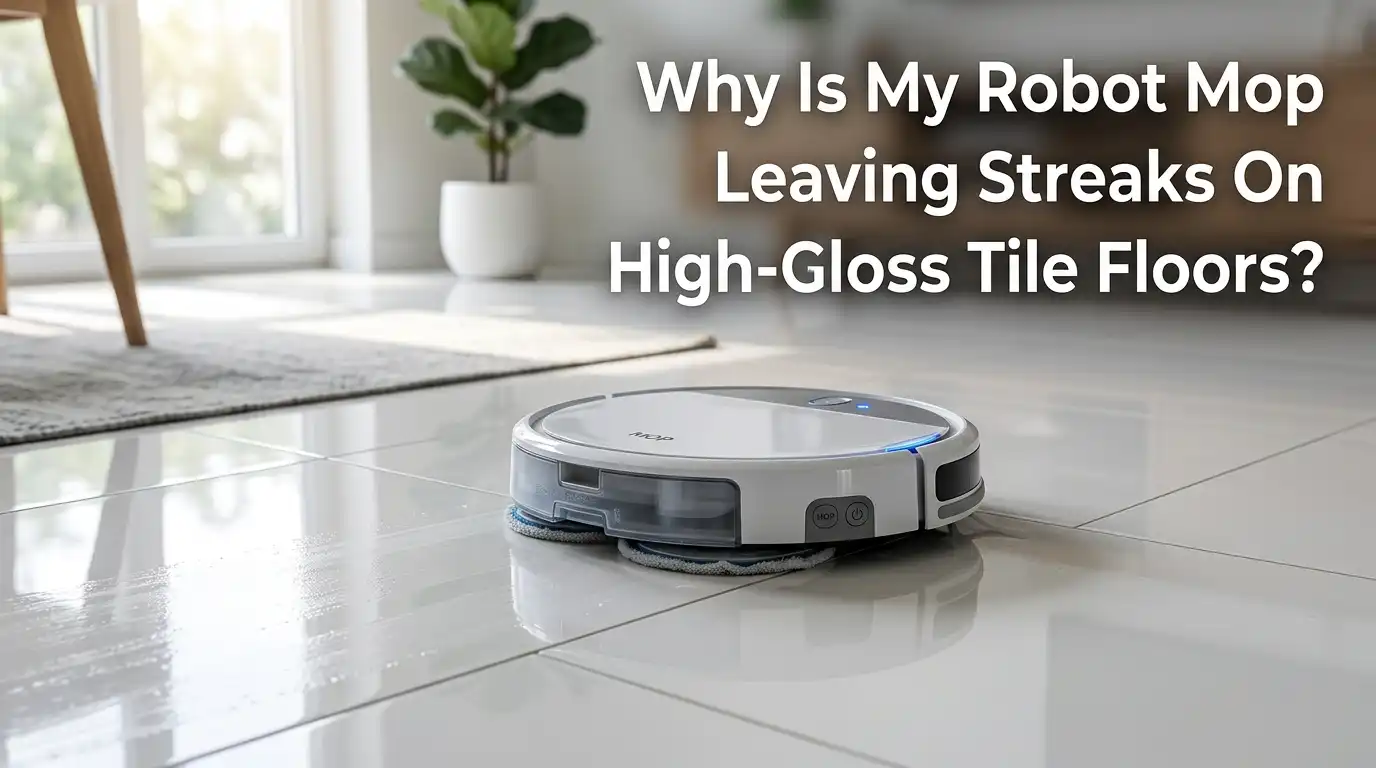
Why Is My Robot Mop Leaving Streaks On High-Gloss Tile Floors?
You walk into your kitchen after your robot mop finishes its cycle. Instead of a sparkling, mirror-like floor, you see dull, hazy tracks running across your beautiful high-gloss tiles. It feels like a betrayal.
You bought this smart device to save time and effort, and now you have to rewash the floor by hand anyway. You might even wonder if your robot mop is broken or if your tiles are simply impossible to clean.
Neither is true. The problem has specific causes, and each one has a straightforward solution. High-gloss tile floors are among the most unforgiving surfaces in any home. Their reflective finish highlights every drop of water, every speck of dust, and every uneven swipe.
Key Takeaways
| Dirty mop pads are the top cause of streaks | A mop pad that is already saturated with dust, oil, and grime simply spreads filth across your glossy tiles. Using a fresh pad or washing pads between rooms makes a visible difference. |
| Hard water leaves mineral deposits that look like streaks | Tap water contains calcium and magnesium that remain on your floor after the water evaporates. Switching to distilled or demineralized water can eliminate white, chalky streaks within one cleaning cycle. |
| Too much cleaning solution creates a sticky film | Most people use two to three times more cleaner than needed. Excess soap does not rinse away and leaves a cloudy residue that attracts more dirt. Using less solution or plain water works better on glossy surfaces. |
| Vacuuming before mopping is a non-negotiable step | Dust, hair, and grit on the floor mixed with water create muddy streaks. Always run the dry vacuum mode first, or manually sweep before the mop cycle begins. |
| Water flow settings dramatically affect your results | High water flow on glossy tiles leaves puddles that dry unevenly into streaks. A low or medium water setting paired with slow evaporation helps the floor dry uniformly. |
| Regular maintenance of your robot mop prevents long-term streak buildup | Sensors, wheels, brushes, and the water tank all collect grime over time. Cleaning these components weekly and replacing worn pads every two to three months keeps performance consistent. |
Understand Why High-Gloss Tiles Show Streaks More Than Other Floors
High-gloss tiles have a smooth, reflective surface that works like a mirror. Any imperfection in the cleaning process becomes instantly visible. On matte or textured tiles, a thin film of water simply evaporates without drawing attention.
On glossy tiles, that same film creates a visible pattern of light and shadow that your eye interprets as a streak. The physics here is simple. Water droplets on a shiny surface act like tiny lenses that bend light unevenly.
When the water evaporates, it leaves behind whatever was dissolved in it. That could be minerals, soap residue, or fine dust. The result is a visible track where the mop pad passed. This is why you might notice streaks even when your robot mop appears to be working correctly.
The good news is that your tiles are not the problem. The cleaning process needs a few adjustments. Once you understand that glossy tiles demand lower water volume, cleaner pads, and purer water, you can tune your robot mop to deliver that streak-free shine you want.
Start With a Dry Vacuum Run Before Every Mopping Cycle
One of the most common mistakes people make is sending their robot mop onto a dusty floor. When the mop pad meets loose dirt, hair, and fine grit, it turns that debris into a muddy paste. The mop then drags this paste across your glossy tiles, leaving visible brown or gray streaks as the moisture dries.
The fix is simple and takes no extra effort on your part. Set your robot to run a dry vacuum cycle first. Most hybrid robot vacuums have a setting that allows you to vacuum and then mop in sequence.
If your model does not support this, run the vacuum mode manually before you attach the mop pad. When you remove all loose particles from the surface, the mop pad only has to deal with the thin film of dust that remains bonded to the tile.
Pros: Eliminates muddy streaks completely, extends mop pad life, improves overall floor hygiene.
Cons: Adds time to the total cleaning cycle, requires a robot that supports dual mode or manual switching.
Inspect and Replace Your Mop Pad Regularly
Think about what your mop pad goes through during a cleaning cycle. It picks up dissolved dirt, skin oils, food residue, and bacteria. After about 20 minutes of mopping, the pad becomes saturated with grime.
From that point forward, it stops cleaning your floor and starts spreading dirty water instead. On high-gloss tiles, this spreading effect looks like long, dull streaks that follow the robot’s path. Inspect your mop pad before every cycle.
If you use reusable microfiber pads, wash them after every single use. Avoid fabric softener when washing mop pads. Fabric softener coats the fibers with a waxy layer that blocks water absorption. Dry the pads completely before reinstalling them.
If you use disposable pads, never try to squeeze extra life out of them. Replace them after each session. Some premium robot mops wash their own pads at the base station. If yours has this feature, set the mop washing frequency to the shortest interval your model allows, especially when cleaning glossy floors.
Pros: Dramatically reduces streaking, improves hygiene, prevents pad odor.
Cons: Requires extra laundry or pad purchases, self-washing stations increase water usage.
Use Distilled or Demineralized Water in the Tank
Tap water contains dissolved minerals like calcium, magnesium, and sometimes iron. When the water on your floor evaporates, the water vapor rises into the air, but the minerals stay behind. On a white or light-colored glossy tile, these mineral deposits look like chalky white streaks.
On dark glossy tiles, the same deposits appear as cloudy gray or white haze. The severity depends on your local water hardness. If you live in an area with hard water, you will notice these streaks almost immediately after the floor dries.
The solution is simple and cheap. Fill your robot mop’s water tank with distilled water instead of tap water. You can buy distilled water at any grocery store, or you can use water from a home dehumidifier if you have one.
Some users also report excellent results with demineralized water designed for steam irons. After switching to distilled water, many people see their streak problem disappear within a single cleaning session.
Pros: Eliminates mineral streaks completely, inexpensive, extends the life of internal robot components.
Cons: Requires buying distilled water regularly, adds a small ongoing cost.
Reduce the Amount of Cleaning Solution You Use
More soap does not equal more clean. In fact, using too much cleaning solution is probably the single biggest reason people see cloudy streaks on glossy tile. When you add too much floor cleaner to the water tank, the mop cannot rinse it all away.
The soapy residue dries on the tile surface as a thin, sticky film. This film looks cloudy in daylight and feels slightly tacky underfoot. It also attracts dust and footprints, meaning your floor looks dirty again within hours. The fix is straightforward.
Use half the amount of cleaner recommended on the bottle label, or skip the cleaner entirely and use plain distilled water. Many high-gloss tile owners find that plain water delivers the best shine because it leaves nothing behind.
If you do need a cleaner for sanitizing or odor control, use only the manufacturer-recommended solution for your specific robot mop model. Never pour generic supermarket floor cleaner into the tank.
Pros: Prevents sticky residue buildup, saves money on cleaning products, protects robot internals.
Cons: May not sanitize as effectively for homes with pets or young children.
Adjust the Water Flow Setting to a Low or Medium Level
Your robot mop typically has a water flow setting that you can control through the companion app. Options usually include Low, Medium, and High. On glossy tiles, high water flow is almost always a mistake.
When the mop lays down more water than the tile can evaporate quickly, the water pools in tiny depressions and along grout lines. As these pools dry at different rates, they create visible uneven patches.
A low water setting releases just enough moisture to dampen the pad and dissolve surface film without saturating the floor. The tile then dries quickly and evenly, leaving no visible track.
If your model allows it, set the robot to use a lower flow rate for the main living areas and a slightly higher rate only for the kitchen where grease may be present. Some robots can automatically detect floor type and adjust water output.
Pros: Prevents puddles and uneven drying, reduces drying time, conserves water.
Cons: May not clean heavy greasy messes effectively, requires some trial and error to find the right setting.
Set the Robot to Mop in a Crosshatch or Double Pass Pattern
Many robot mop apps let you choose a cleaning pattern. The default pattern typically sends the robot in long, straight lines across the room. On glossy tiles, this single-direction pass can leave visible tracks where each row of the mop pad overlaps slightly with the previous row.
To solve this, set your robot to a deep cleaning mode that makes two passes over the same area in perpendicular directions. The first pass loosens and lifts the bulk of the soil. The second pass, at a right angle, picks up what the first pass left behind and smooths out the moisture layer.
The result is a more even distribution of the remaining moisture, which dries without visible lines. If your robot does not have a deep clean mode, you can achieve the same effect by running a normal mop cycle twice, about 10 minutes apart.
Pros: Virtually eliminates track lines, buffs tiles to a higher shine, improves overall cleaning thoroughness.
Cons: Doubles the cleaning time, uses more battery, increases pad wear.
Wash or Replace Mop Pads Between Rooms
Your kitchen floor has grease and food residue. Your bathroom floor has soap scum and toothpaste spots. Your hallway has outdoor dust tracked in on shoes.
If your robot mops all these rooms with the same pad without washing it in between, it simply transfers grease from the kitchen onto your glossy hallway tiles. The result looks like a dull film that appears in patches.
If your robot has a self-washing base station, set the mop wash frequency to trigger after every room. This keeps the pad fresh for each new surface.
If your robot does not have this feature, pause the cleaning between rooms, remove the pad, rinse it thoroughly under warm water, squeeze it dry, and reattach it. Better yet, have two or three clean pads ready and swap them between rooms.
Pros: Prevents cross-contamination between rooms, each room gets a fresh cleaning surface, visible reduction in greasy streaks.
Cons: Time-consuming for manual pad swaps, self-washing stations increase water and energy use.
Buff the Floor Dry After the Robot Finishes
This is the secret that professional cleaners use and most homeowners skip. After your robot mop finishes its cycle, the floor still has a thin layer of moisture. As that moisture evaporates naturally, it can leave behind water spots and faint mineral traces.
Taking two minutes to buff the floor with a dry microfiber cloth while it is still slightly damp removes that final layer of moisture before it has a chance to leave spots. You do not need to scrub. Just glide a clean, dry microfiber cloth over the surface in the same direction as the tile grain.
The cloth picks up the remaining moisture and any tiny amount of residue that might have been left behind. The result is a flawless, mirror-like shine that looks like the floor was hand polished.
Pros: Delivers a professional, mirror-like shine, eliminates final water spots, takes under two minutes per room.
Cons: Requires manual effort after an automated cycle, adds microfiber cloth laundry.
Deep Clean the Water Tank, Sensors, and Wheels Weekly
Your robot mop has hidden areas that collect grime over time. The water tank can develop a slimy biofilm, especially if you use cleaning solutions or if the tank stays wet between uses. Dirty water from a contaminated tank leaves residue on your glossy tiles that looks like faint gray streaks.
The drop sensors and cliff sensors on the bottom of the robot also collect a fine layer of dust that the mop pad can pick up and spread. The wheels roll through the same dirty water and then track it onto dry sections of the floor.
Set a weekly reminder to perform a quick deep clean of your robot. Empty and rinse the water tank with warm water and a few drops of white vinegar to kill any bacteria. Wipe the tank dry before refilling it.
Pros: Maintains consistent performance, prevents odor, extends the life of robot components.
Cons: Adds a weekly chore, requires disassembly and reassembly of small parts.
Choose the Right Mop Pad Type for Glossy Floors
Not all robot mop pads are the same. The three main types are flat static pads, dual spinning pads, and roller mop systems. On high-gloss tiles, each type behaves differently. Flat static pads are dragged behind the robot and rely on the machine’s weight to apply pressure.
They work well for light dust but tend to leave stop-and-go marks because the moisture distribution is uneven. Dual spinning pads scrub more actively and cover more area, but their circular shape can miss corners and occasionally leave swirl marks on glossy surfaces.
Roller mop systems apply consistent pressure across a wider contact area and continuously pump dirty water into a separate tank while dispensing fresh water. This design keeps the cleaning surface much cleaner during operation.
If you have a choice between mop types when buying a robot, roller mop systems generally produce fewer streaks on glossy tiles. If you already own a flat pad or spinning pad robot, focus on pad freshness and water control to compensate.
Pros of roller mops: Continuous self-cleaning, consistent pressure, fewer streaks. Cons: Higher purchase price, more complex maintenance.
Pros of flat pads: Affordable, simple, quiet. Cons: Uneven moisture, drags dirt.
Pros of spinning pads: Better scrubbing than flat pads, often self-lifting. Cons: Swirl marks on gloss, edge gaps.
Manage Room Humidity and Airflow During Mopping
The final factor that affects streaking is the environment inside your home. High humidity slows water evaporation dramatically. At 70 percent relative humidity, water on your glossy tiles can take twice as long to dry, which doubles the chance of uneven drying and visible streaks.
Open a window or turn on a ceiling fan during and after the mopping cycle. Moving air carries moisture away from the tile surface quickly, promoting even evaporation. If you live in a very humid climate, run a dehumidifier in the room for 30 minutes before and after the robot mops.
On the other hand, very dry air can cause water to evaporate so fast that dissolved minerals do not have time to spread into an invisible film. They remain concentrated where the droplet sat, creating white spots.
The ideal indoor humidity for robot mopping glossy tiles is between 40 and 50 percent. A simple humidity monitor helps you track this. Adjusting your home environment is often the missing piece that solves streak problems even when every other setting and method is already optimized.
Pros: Speeds up drying, reduces mineral spotting, improves overall floor appearance.
Cons: May increase energy costs if using a dehumidifier or fan, not always practical in all climates.
Know When to Strip Old Residue and Start Fresh
If you have tried all the methods above and your glossy tiles still show streaks, you may be dealing with old residue buildup from weeks or months of incorrect cleaning. Layers of soap scum, fabric softener from mop pads, and hard water minerals can accumulate into a stubborn film.
This film is invisible when dry but turns cloudy and streaky the moment any moisture touches it. The solution is a one-time deep strip clean of your tiles. Mix one part white vinegar with four parts warm water.
Using a manual microfiber mop, thoroughly wet the floor with this mixture, let it sit for three to five minutes, then mop it up with fresh water. The vinegar dissolves the built-up residue without damaging sealed glossy ceramic or porcelain tiles.
Do not use vinegar on natural stone tiles like marble or travertine. After stripping the floor, dry it completely with a clean cloth. Now run your robot mop with distilled water and a fresh pad.
Pros: Removes stubborn hidden residue, resets the floor to a clean baseline, inexpensive with household products.
Cons: Vinegar is not safe for natural stone, requires a manual deep cleaning session, strong vinegar smell temporarily.
Match Your Cleaning Schedule to Your Household Traffic
The frequency of your mopping cycles directly affects streak formation. In a home with two adults and no pets, running the robot mop every other day with a light water setting keeps the floor clean without buildup.
In a home with kids, pets, and heavy kitchen use, daily mopping may be necessary. However, frequent mopping with dirty pads or hard water simply adds more residue faster.
Adjust your schedule so that your robot mops right after the heaviest use periods, such as after dinner cleanup or after the morning rush. Also, consider scheduling a deep clean mode once a week that includes the double pass method discussed earlier.
The rest of the week, a quick light pass maintains the shine. The goal is to remove soil before it bonds to the tile, but not to over-wet the floor so often that residue accumulates.
Pros: Maintains consistent floor appearance, reduces the need for manual deep cleaning, saves water and energy.
Cons: Requires some experimentation to find the ideal rhythm for your specific home.
FAQs
Can I use vinegar in my robot mop tank to prevent streaks?
No. You should never put vinegar inside your robot mop’s water tank or internal plumbing. Vinegar is acidic, and over time it can corrode the rubber seals, plastic connectors, and small pumps inside your machine. Use vinegar only for manual tile stripping as described in Section 13 of this post. For the robot tank, stick to distilled water or the manufacturer-recommended cleaning solution.
Why do I see footprints immediately after my robot mops?
Footprints appear on glossy tiles when there is a thin film of residue on the surface. This residue is usually leftover cleaning solution or mineral deposits from hard water. The moisture from your feet activates the film and makes footprints visible. To fix this, run a rinse cycle with distilled water and no cleaner. Also, buff the floor dry after the robot finishes. If footprints keep appearing, strip the old residue from your tiles as described in the deep clean section above.
My robot has a self-cleaning mop station. Do I still need to wash the pads manually?
Yes, but less often. Self-cleaning stations rinse the pads during the cycle, which keeps them fresher than manual pads. However, over two to three months, microfiber pads still accumulate deep-set grime and oils that the station cannot fully remove. Remove the pads once a month, wash them in your laundry machine with hot water and no fabric softener, and let them air dry. This deep manual cleaning restores the pad’s absorption ability and prevents the gradual return of streaks.
Is a roller mop robot always better for glossy tiles than a spinning pad robot?
Generally, yes. Roller mop robots continuously extract dirty water and apply fresh water, which means the cleaning surface stays cleaner throughout the cycle. This design reduces the chance of dirty water being spread across the floor. However, spinning pad robots can also achieve streak-free results on glossy tiles if you use distilled water, clean pads, low water flow, and the double-pass method. The difference is that roller mop robots typically require less effort to get the same result.
Can I use hot water in my robot mop tank?
Check your robot’s manual first. Some models allow warm water, but most manufacturers recommend room temperature or cool water. Hot water can warp plastic components and damage rubber seals inside the tank. If you want faster evaporation, place a fan in the room or open a window rather than using hot water in the machine. The risk of damaging internal parts is generally not worth the small benefit of slightly faster drying.

Hi, my name is Lily you can say i am a gadget hunter at this point. Welcome to Gadget Gallery The Gallery of Gadget Reviews